> For the complete documentation index, see [llms.txt](https://docs.flosum.com/llms.txt). Markdown versions of documentation pages are available by appending `.md` to page URLs; this page is available as [Markdown](https://docs.flosum.com/global-settings/global-settings-docs-ja/sekyuriti/miapuri/mcpakusesunoconnected-appwosuru.md).
# MCPアクセス用のConnected Appを作成する
{% hint style="success" %}
#### 必要なユーザー認証情報
\[**Flosumユーザー**] - **システム管理者** 役割
{% endhint %}
{% hint style="warning" %}
#### ベータ版
DevOps および Backup & Archive MCP サーバーはベータ版です。この記事に記載されている Connected App の設定は変更される可能性があり、このドキュメントにはサーバーの最新の変更が反映されていない場合があります。
{% endhint %}
##  概要
この記事では、Connected App を作成し、DevOps および Backup & Archive MCP(Model Context Protocol)サーバー用の **クライアント ID** と **クライアントシークレット** の値を取得する方法を説明します。ChatGPT や Claude などの AI アシスタントは、これらの値を使用して MCP サーバーに接続し、DevOps または Backup & Archive のデータを操作します。
{% hint style="info" %}
#### すべてのユーザーに共通の Connected App
MCP にアクセスするために必要な Connected App は、テナントごとに 1 つだけです。この Connected App は DevOps と Backup & Archive の両方の MCP サーバーで使用され、すべてのユーザーがこれを介して接続します。各ユーザーが AI アシスタントを接続する際には、自分自身の Flosum ユーザーとしてサインインします。そのため、アシスタントは Connected App の作成者ではなく、サインインしたユーザーとして MCP サーバーに接続します。
{% endhint %}
## Connected App を作成する
{% stepper %}
{% step %}
### グローバル設定にアクセスする
1. 任意の **Flosum Cloud App**で、 **アプリスイッチャー** アイコンを左側のサイドバーメニュー上部でクリックします。
2. クリック **グローバル設定**.
3. その **グローバル設定** アプリは新しいタブで開きます。
{% hint style="info" %}
グローバル設定には、Flosum Cloud Apps のログインURLから直接ログインしてアクセスすることもできます。ログイン手順については、以下の記事を参照してください。
* [グローバル設定にログインする](https://docs.flosum.com/global-settings/global-settings-docs-ja/hajimeni/gurbaruniroguinsuru.md)
{% endhint %}
{% endstep %}
{% step %}
### 新しい Connected App を作成する
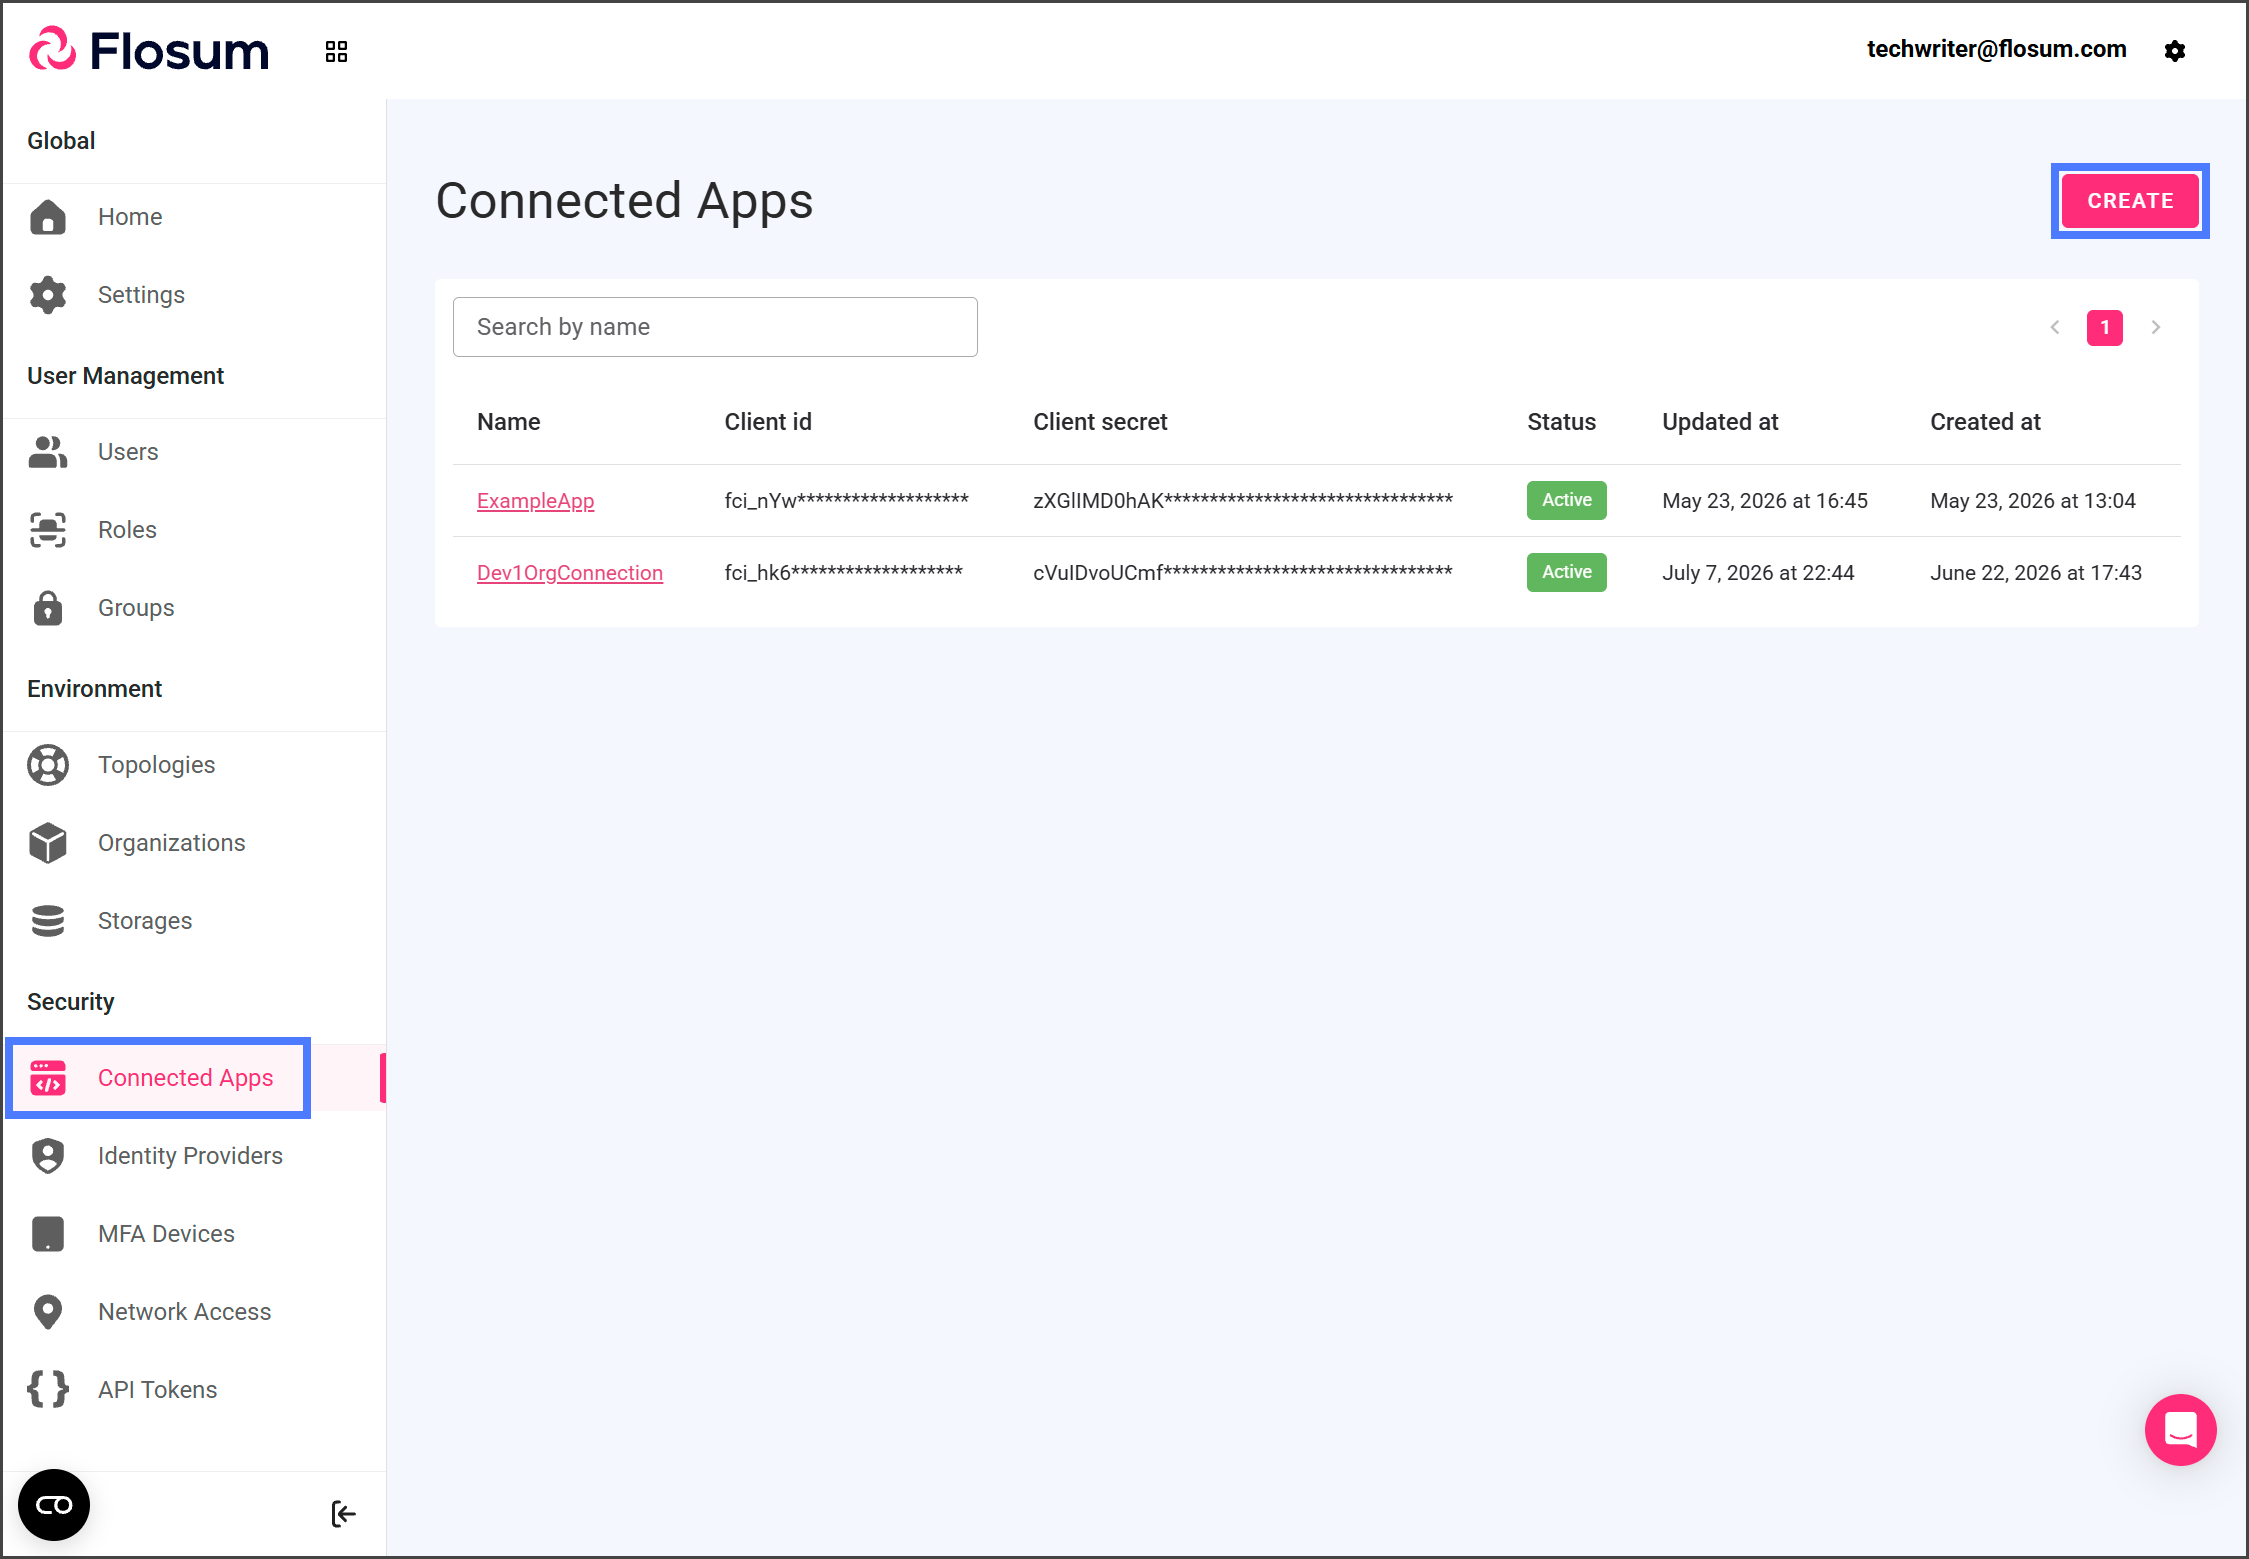
1. 左側のサイドバーメニューで **Connected Apps** をクリックします。
2. 「 **作成**.
3. Connected App の **名前** を入力します。
4. 「 **作成**.
{% endstep %}
{% step %}
### Connected App を設定する
1. 作成した Connected App をクリックします。
2. 「 **編集**.
3. をクリックします。 **「認証フロー」** ドロップダウンメニューをクリックします。
4. 「 **認証コード** 」チェックボックスをオンにします。
5. 「 **更新トークン** 」チェックボックスをオンにします。
6. 「 **更新トークンの有効期間** 」フィールドに、トークンに適用する有効期間を入力します。詳しくは、以下のヒントを参照してください。
{% hint style="info" %}
#### 更新トークンの有効期間
「 **更新トークンの有効期間** 」では、ユーザーの接続状態を維持する期間を設定します。これはユーザーがサインインした時点から計算され、AI アシスタントを最後に使用した時点からではありません。たとえば有効期間を 30 日に設定すると、AI アシスタントを毎日使用していても、ユーザーは 30 日ごとに再度サインインする必要があります。
Flosum では 30 日を推奨しています。セキュリティポリシーで必要な場合は、より短い有効期間を設定できます。値は 5 分以上 365 日以下である必要があります。
「 **アクセストークンの有効期間** 」は 5 分のままにします。アクセストークンの有効期間が切れると、接続は更新トークンを使用して新しいアクセストークンを取得するため、ユーザーは再度サインインする必要がありません。
{% endhint %}
{% hint style="info" %}
#### コールバック URL
「 **許可されたコールバック URL** 」は、今は空のままにします。各 AI プロバイダーが独自のコールバック URL を提供します。SystemAdministrator がその URL を追加するには、 **URL を追加** そのプロバイダーを接続するときに使用します。1つの Connected App に、複数の AI プロバイダーや MCP サーバーのコールバック URL を設定できます。以下の記事では、この手順について説明しています。
* [ChatGPTをDevOps MCPサーバーに接続する](https://docs.flosum.com/devops/devops-ja/mcpsb/chatgptwodevops-mcpsbnisuru.md)
* [ClaudeをDevOps MCPサーバーに接続する](https://docs.flosum.com/devops/devops-ja/mcpsb/claudewodevops-mcpsbnisuru.md)
{% endhint %}
7. クリックします **保存**.
{% endstep %}
{% step %}
### Client ID と Client Secret をコピーする
各 MCP サーバーに AI アシスタントを接続するときに、 **クライアント ID** と **クライアントシークレット** を入力します。これらの値は Connected App からコピーできます。
1. をクリックして **クライアント ID** フィールドの値をコピーします。
2. コピーした値を保存します。
3. をクリックして **クライアントシークレット** フィールドの値をコピーします。
4. コピーした値を保存します。
{% hint style="warning" %}
#### クライアントシークレットの共有
どのユーザーもグローバル設定にログインして、この Connected App の **クライアント ID** と **クライアントシークレット** をコピーできます。ユーザーに **クライアントシークレット** を送信するのではなく、Connected App の名前を伝えて、自分で値をコピーしてもらいます。チャットメッセージやスクリーンショットで **クライアントシークレット** を共有しないでください。
{% endhint %}
{% endstep %}
{% endstepper %}
---
# Agent Instructions
This documentation is published with GitBook. GitBook is the documentation platform designed so that both humans and AI agents can read, navigate, and reason over technical content effectively. Learn more at gitbook.com.
## Querying This Documentation
If you need additional information that is not directly available in this page, you can query the documentation by asking a question.
Perform an HTTP GET request on the following URL with the `ask` and `goal` query parameters:
```
GET https://docs.flosum.com/global-settings/global-settings-docs-ja/sekyuriti/miapuri/mcpakusesunoconnected-appwosuru.md?ask=&goal=
```
`ask` is the immediate question: it should be specific, self-contained, and written in natural language.
`goal` is what the user is ultimately trying to achieve, the reason they need the answer. Sharing it helps GitBook give you a better, more relevant answer. A goal is most helpful when it describes the outcome the user wants rather than restating the question. For example, with `ask=how do I create an API token`, a goal like `automate deployments from our CI pipeline` lets GitBook tailor the answer to that use case.
The response will contain a direct answer to the question and relevant excerpts and sources from the documentation.
Use this mechanism when the answer is not explicitly present in the current page, you need clarification or additional context, or you want to retrieve related documentation sections.